Showing posts with label Sewing. Show all posts

Sunday, May 19, 2013

Old jeans into fabulous new skirt!

Looking for fabric for my daughter's doll project, I discovered this old pair of jeans prepped for making into a skirt.  I had taken out all of the inseam and then for some reason put them aside for another day.    I was wanting a new skirt for Spring, and this was a perfect, quick and easy project.

1.  Cut just beside (under) the seam on the front crotch on the curve so the cut away part will lay flat underneath side with the seam.  The seam can lay flat on top and be topstitched down. 

2.  On the back I pinned to get everything mostly flat and then sewed a straight seam down that line.  The open triangle in the back is lower and a little wider than in the front.  There is quite a bit of extra fabric on the inside of the back that can be cut away and zigzag or serge the edges to prevent fraying.

3.  At this point, I tried it on to check fit. Everything looked great except it dragging the floor.  While I love the floor length look, 4 kids running around makes floor lenght very impractical.  I took off 6 inches to bring my hem up to ankle length.

4. I've had this gorgeous, embroidered fabric sitting for a while, waiting for the right project.  I decided to cut my gores on the bias, so I matched a corner with the point of my triangle on the jeans and matched up the straight edges.   This made the gore fuller than the opening triangle which made a lovely flare.  I curved the gore just a bit to match the curve the legs were making. 

5.  Same for the back gore.  I zigzagged around all the edges of the gore to stop fraying. I also zigzagged the bottom of the jeans where I had cut them off.


6. Next I lined up the edges of the gore under the edges of the jeans and stitched along the previous seam lines.


7. To finish up the bottom seam I used a straight stitch to attach lace all around the bottom edge, then pressed the raw edge under and edge stitched to keep the lace facing down.


8. Sorry for the bad pic, didn't have anyone to be photographer for me.


Here's a little bit better. The skirt is very comfy and I've been wearing it everywhere.  This only took a few hours one evening.

Sunday, May 5, 2013

Cloth Diapers -AI2

I finished a couple of All-in-2 diapers for a customer this weekend. Got to try out the new Zorb II.  It's very thin and has a nice soft jersey outer layer so it can be used alone without needing to be encased.

All-in-2 diapers can be used just like an all-in-1, everything gets washed when wet or dirty, but the absorbent pad comes separate from the cover to speed drying time some. You do have to pair them back up after laundering, but no pocket to have to stuff.


First Step: Using diaper pattern of your choice (I made this pattern to match measurements, sort of based on the shape of Fuzzi Bunz). Cut out one each of PUL fabric, soft lining (velour), and cotton cover (optional).
I used a waterproof layer of plain white PUL with a cute cotton print layered outside of it just for looks. The white PUL is fine by itself if you like white diapers.  Inside I used jersey velour.  Very soft stuff that helps to wick moisture away from skin.


I layered them together the way I want them in the finished diaper. So that's cotton on the bottom, right side down, then the PUL shiny side facing up (into the diaper), lastly, the velour, fuzzy side up).

I stitched the three layers together with a straight stitch close to the edge just to keep them from sliding around while attaching FOE.  

Remember: when sewing PUL you want to avoid making unnecessary holes, so no pins, I usually use paper clips to hold layers together.


Next for gussets, sorry I didn't get a picture.  You just need a semi circle piece that matches the curve on the leg.  I just keep the curve that is leftover from cutting out the PUL layer and cut a straight line across to match two points about 1/4 of the way down the curve on each end.  We then sew on fold over elastic while stretching across the straight edge.   This gives you a gathered straight edge with the curve unbound.


Attach the gusset pieces to the inside layer of the diaper, matching the curve they came from. Wrong
side of the gusset should be facing the inside of the diaper. Now we're ready to attach the FOE to the diaper.


I like to start at the back, stretching the FOE across the middle of the back and around the leg curves.  To start the FOE use a zigzag stitch, backstitch a little at the beginning and then you can use the thread tail to pull   Be sure to catch the gusset edge in the elastic also.  Stretch just enough on the rest to conform to curves.

When you get all the way around, just overlap the elastic a bit. No need to fold under the ends or anything, it doesn't fray.


Last is the velcro. I usually attach the loop side on the tabs, since it could come in contact with skin. About 1 1/2" square is usually sufficient and I just zigzag all around to secure it down. Then the hook side is on the front of the diaper. Usually, a long strip across the front about an inch down from the top and an inch or two from each side to give plenty of room for size adjustment.  


To make the cover into an all-in-2, I added a strip of velcro to the back inside of the diaper a couple inches from the edge.  
I made an rectangular insert (1" less than the width of the cover in the middle and 1 or 2" less than the length of the cover) from 3 layers of Zorb-2, zig-zag stitched all around the edge. If using regular Zorb, it needs to covered in another fabric like the velour used for the inner diaper or flannel. The Zorb 2 has jersey on the outside and is pretty soft.    Attach a strip of hook tape to one side of the insert an inch or two from one end to hold it secure in the cover.

Washing Instructions:

To seal up holes from stitching, you can put the cover in a hot dryer before use. Avoid using the dryer for regular laundering as it weakens the PUL.   Wash in hot water, no bleach and definitely no fabric softener and hang to dry. I always use white vinegar in my rinse cycle. It helps remove odors and helps all soap rinse away.

With any absorbent diapers, you need to wash and dry them a few times (preferably in nice hot water) before use to "fluff" them for maximum absorbancy. Expect to get a bit of shrinkage in this process.
Never use fabric softener on cloth diapers, it causes fabric to repel liquids, definitely not something you want diapers to do!

Monday, April 1, 2013

Baby Showers

We have lots of baby and wedding showers coming up soon, and me with no money to spend. I like to give handmade gifts anyways! I just have to be a bit more creative in using supplies I already have or find a nice upcycling project.  

I have plenty of yarn, especially cotton and I love baby shoes. There are so many amazing free patterns on the internet.  These are the ones I liked.
Some really cute loafers (with video tutorial) from Crochet Hooks You for the boys and some adorable slippers for the girls from Moira Crochets.

I have been working on thinning out my fabric stash, but still have enough for some baby footwear. They use such small pieces. I also think denim for baby shoes is super cute & and great way to re-use worn out jeans.  Again, some nice free patterns. I love the pinstripes on these little man shoes from Schwin & Schwin or these nice basic baby shoes from Stardust Shoes to personalize with fabric or embellishments.

For friends I know are going the cloth diaper route, and if I have appropriate fabrics, I can do some diaper covers or inserts.  But, that'll have to be another post. I don't have pictures ready.

For weddings I like to do nice napkins.  I am striving for a greener lifestyle and cloth napkins help to cut back on paper use and they're nice for fancy dinners too.  There are lots of ways to finish the edges on napkins, I like the mitered corners shown nicely by Skip to my Lou, they look extra fancy.


PS. Need to get someone to teach me how to do picture links!!

Tuesday, January 17, 2012

Aromatherapy cold day friends

I made some cute, rice filled handwarmers for Christmas gifts. When I showed them to my aunt she had a wonderful idea to make them bigger for the kids to snuggle during cold car rides. I thought that was great and could even make them teddy bear shaped and put some lavender in them to smell nice. So what do I see at Kroger today?These aromatherapy buddies. Stuffed animals, filled with rice or something similar and lavender. So, I'm thinking, what a wonderful way to use some of our multitude of stuffed toys, I picked out a few small toys that aren't played with much.

They all turned out to be Ty beanies, which made this whole process much easier. I undid the stitching in the back and removed the beanbag (some are attached and had to rip out a few more stitches to release it.)

 The blue teddy had bean bags in the hands and feet in addition to the butt bag. I unstuffed teddy completely (except the nose due to embroidery) so he could get a good washing.

 I made rice / lavender bags to match the bean bags that were there originally. I did make the rice bags slightly larger so there will be more warm area.

I filled the bags about half full (like the original bags) with mostly rice, maybe 1/3 lavender.

I put the bags in the arms & legs first, put some stuffing in the tummy first then added the rice bags and more stuffing on top. Stitch the back closed again and they are ready for 30 sec in the microwave and a snuggly car ride. The kids enjoyed them. The lavender helped calm the baby down for a peaceful car ride and they even like sleeping with them!

PS.  My eldest requested one of her little care bear toys be converted. This was not a Ty beanie, and is a very small toy (no bigger than my hand). So we took out all the stuffing from the body, leaving the head and legs stuffed. We stuffed it with plain rice (she didn't like the lavender scent, and no bean bag for this one) using a pencil to get rice into the arms. Then we stitched up the back nice & tight so no rice escapes and it was ready for use - start to finish - 1/2 hour.

Monday, October 3, 2011

DIY "Moby wrap"

I am an ardent baby carrier and have enjoyed carrying all three of my children in infancy. With my oldest I made a pouch carrier and used it for the first few months but found it too inflexible and switched over to the Baby Bjorne for most of her carrying.
When my son came along I discovered the ring slings and the flexibility that I was missing in the pouch. I made myself a beautiful pink striped carrier and used it often for carrying my son and then it continued to be used when daughter #2 came along. I was able to carry on taking care of the older two with baby in the carrier. Nursing in public was never a problem as the carrier came with built in coverup. The only issue I had with it is the majority of baby weight is on one shoulder and the back. Having been rear-ended a couple of times has messed up my neck and I'm more prone to soreness there and in my shoulders. I found extended carries could exacerbate the pain.
Seam in middle
This pregnancy I have seen the "latest" carrier - the Moby wrap. It's basically a long (6 yd) piece of fabric ( usually knit cotton jersey) that is wrapped around your waist and over both shoulders. Baby is tucked in the middle and it seems weight is evenly distributed across both shoulders and your back! Sounds like a solution for my sore neck.

tapered end hemmed


finished , just needs pressing
So I googled info on how to make one, decided to go with a woven (more support) rather than knit (more give). I used a flat cotton sheet for fabric. Cut it into 26" strips. It wasn't long enough for the full 6yds so I cut two 3yd strips and seamed them together with a French seam and folded over and sewn down the edge. So, although a seam is not recommended for baby carriers, I feel pretty comfortable with this as it's a very strong seam. I hemmed both edges and ends. I was going to leave like that but on more research found that the Moby wrap actually has tapered ends so there is less bulk. So I went back and tapered the last three feet on each end to a point and re-hemmed the tapered edges. It feels like it fits well, even over my big 37 week belly, so it should be plenty long. I may go get some knit fabric later after seeing how this one works. Knit is so much easier, no sewing required as it doesn't fray. Just cut and you're done!
Wrap on, with preggy belly sticking out the bottom!

Monday, August 29, 2011

Tutorial: Lunch sack style tote

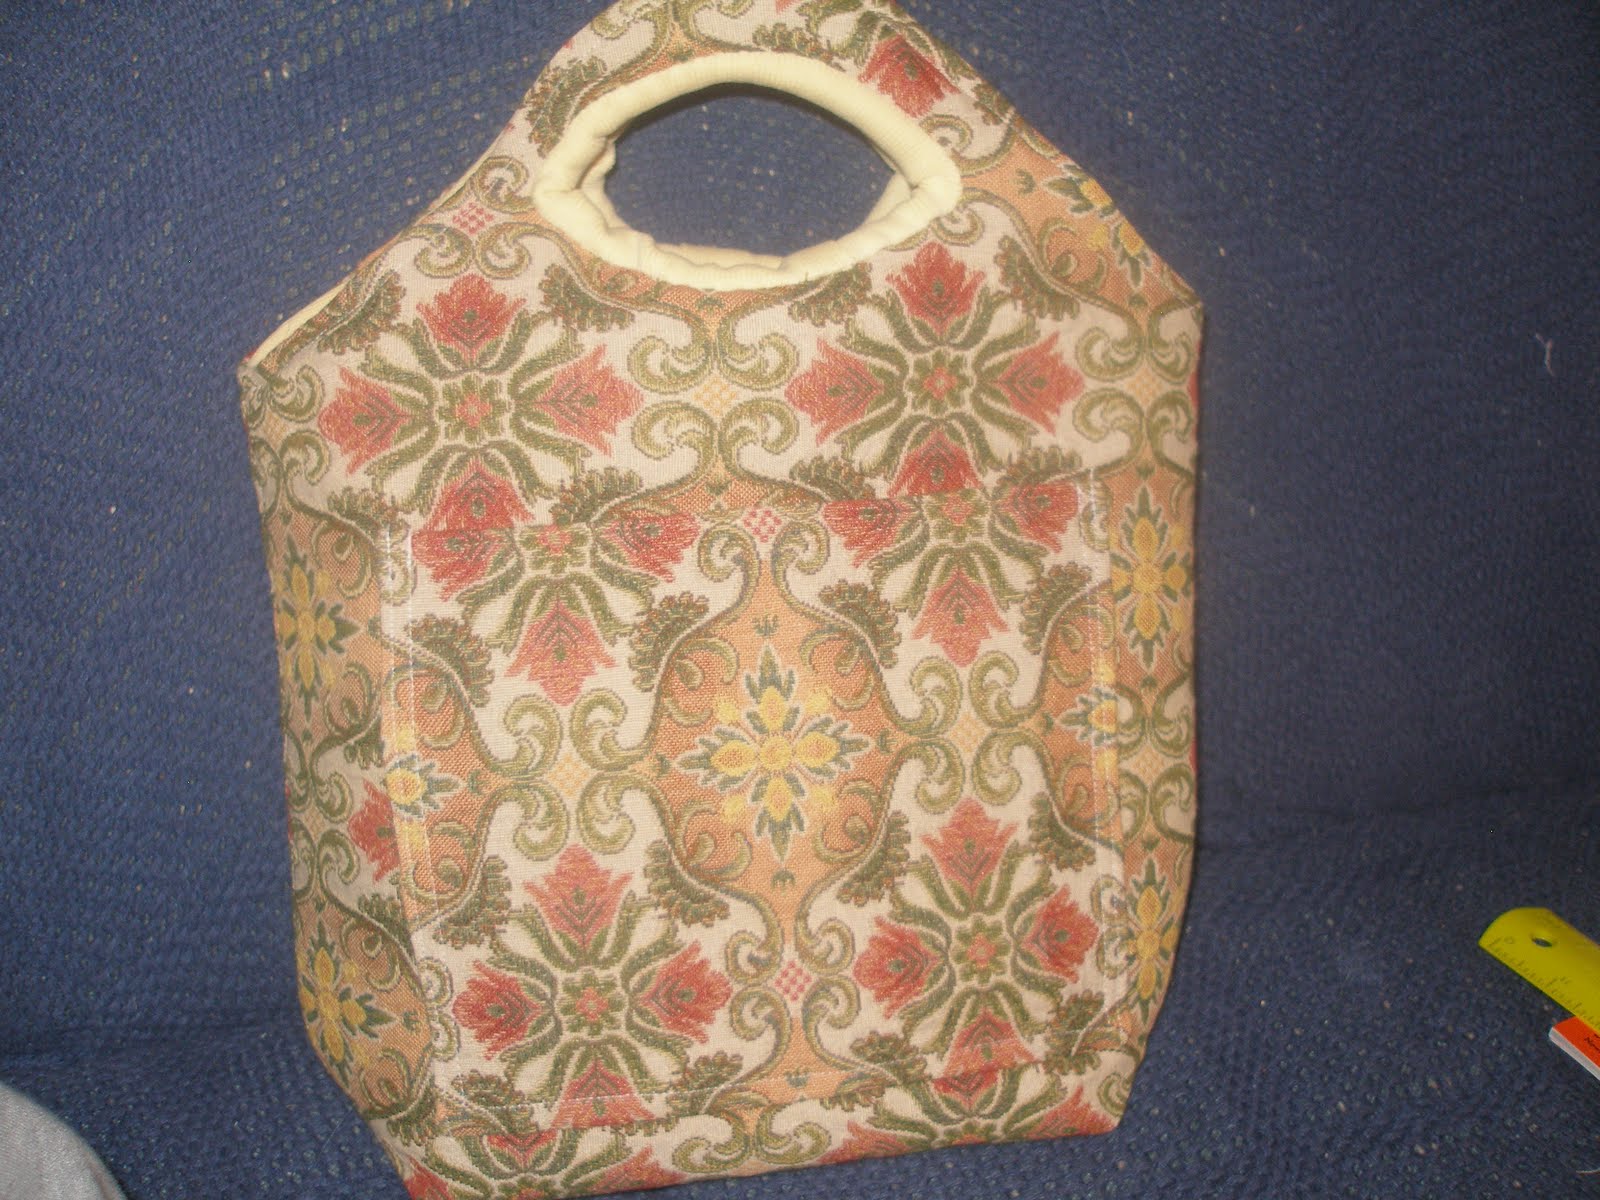
I was needing a nice tote for my little notebook computer and all my different electronic charging cords to carry with me when I go to the hospital. I also wanted it to be nice enough I can  use it as a purse. I had in mind these neoprene lunch totes with cut out handles. I thought I had seen a tutorial somewhere before, but had no luck in finding it. So I decided I can figure this out myself and make my first tutorial! Here  you go!


I started out with some foam I've had around for a while. It's about 1/2" thick. Quilt batting would work great. You can go with the fusible stuff or just regular batting. I placed my computer on the foam, drew a rectangle around the computer - leave a couple inches on each side for the box sides and room to wiggle. I only left about 1 1/2" and it did end up being a little snug on the sides with the notebook sitting horizontally like I had intended. I then added 2" to the bottom to box the bottom of the tote. And then drew a curve above to accommodate the handles.

Use your batting as your pattern or make a paper pattern. Cut out 2 pieces for the outside (I used my tapestry fabric for the outer.) Cut out 2 pieces for the lining (I used one of my hubbies old heavy weight t-shirts). I then cut out a patch pocket from the outer fabric for an outside pocket and two strips about 1 1/2"  less than the width of the main piece.  Since I was using a t-shirt I cut the top of the pocket to be the bottom hem of the shirt to save myself a step.

Next step is to attach your pockets. Hem the top edge of your pockets if needed. Pin your pocket into place about 2 inches below where the curve starts. Fold under the bottom & side edges and top-stitch. For the longer pockets inside you will then stitch straight lines to divide your pockets. I did three on the shorter pocket and 4 on the taller pocket for skinnier cord bundles & pens.


Once you have all your pockets sewn on you will attach the batting to the wrong side of the lining. For non-fusible you will sew a 1/4" all the way around to make it one piece. From now on the batting is the wrong side of the lining and the fabric is the right side. Now, sew the main pieces right sides together. Sew the lining together and then the outer. Sew only the sides up to the curve and the bottom. DO NOT SEW THE HANDLE CURVE!! You should now have two flat sacks - one of the outer fabric and one inner fabric.

This would be the best time to box your corners for a flat bottom bag.  With the right sides facing in you will fold the side seam to match up with the bottom seam. This will make the corner poke out. Measure 2" in from the point of the corner and straight across the corner perpendicular to the seam.  Do this on both bottom corners of inner & outer bag.  Cut off the excess corner, leaving at least 1/4" allowance.


Now you will take one of your sacks and turn it right side out and place it inside the other sack - so you have two sacks right sides together. I left my outer back inside out, turned the liner the foam is showing and placed the liner inside the outer sack. So the layers you will see are outer fabric, liner fabric, foam.  You will now sew around the handle curve. Be sure to leave a good size opening (3-4") for turning. Careful at the side seams. I had to go back and redo the sides to catch all the layers together. Turn your bag right sides out and then tuck the liner inside the outer bag. Now you're getting an idea of what the finished bag will look like. Don't worry, we haven't forgotten about the handles!

Next you want to top-stitch all around the top. Before you start sewing reach inside and make sure the seam is pushed out all around. Then pin your opening closed being sure to fold in all the raw edges and top stitch around. You can kinda pull  the lining more to the inside while stitching if you want to make it look a little nicer.


Now for the handles.  Use a piece of heavy paper or cardboard for your handle pattern. I would make the hole an oval  rather than the pointy shape I used. The points make binding a little difficult.  You want an oval shape about an inch from the top of your bag  that follows the curve somewhat. Copy the shape onto your bag making sure it matches up on each handle. Now stitch on that line through all layers. You might want to pin this to keep fabric from wandering. I didn't have much trouble with it.


 Once you have the stitching in place, cut out your handle about 1/4" from the stitching line.


Now you will need binding. You can use ribbing, fold-over elastic, bias tape,  t-shirt fabric. Anything that has a little stretch to it to allow going around the curves.  I used a thick ribbing from the t-shirt used for the lining fabric.  Whatever you choose to use, you'll want it to be about 1 1/2" wide to accommodate going around all three layers.  You will stitch it right side to right side to the lining. Overlap your ends about 1/2" and fold under the finishing edge if needed. (Bias tape will need to be folded under. Elastic, ribbing, jersey won't ravel, so no need to fold under.) Then you will fold over and either top-stitch or hand stitch to the outside. The corners are a little fiddly. I had trouble getting them to look nice, and just had to work it into place.  I prefer hand stitching for fiddly bits like this, but if you prefer your machine, be sure to use lots of pins! 

And that's it!  Enjoy your new bag! Here's the inside of mine with my computer & accessories.


Sunday, August 21, 2011

Birthday Present


Needed a quick and cute present for my niece and was thinking something for her Nintendo DS, but she's planning on trading it for a newer one soon, so I'm not sure what size it is.
Outside front with button
Inside pockets before sewing closed
Outside back with flower.

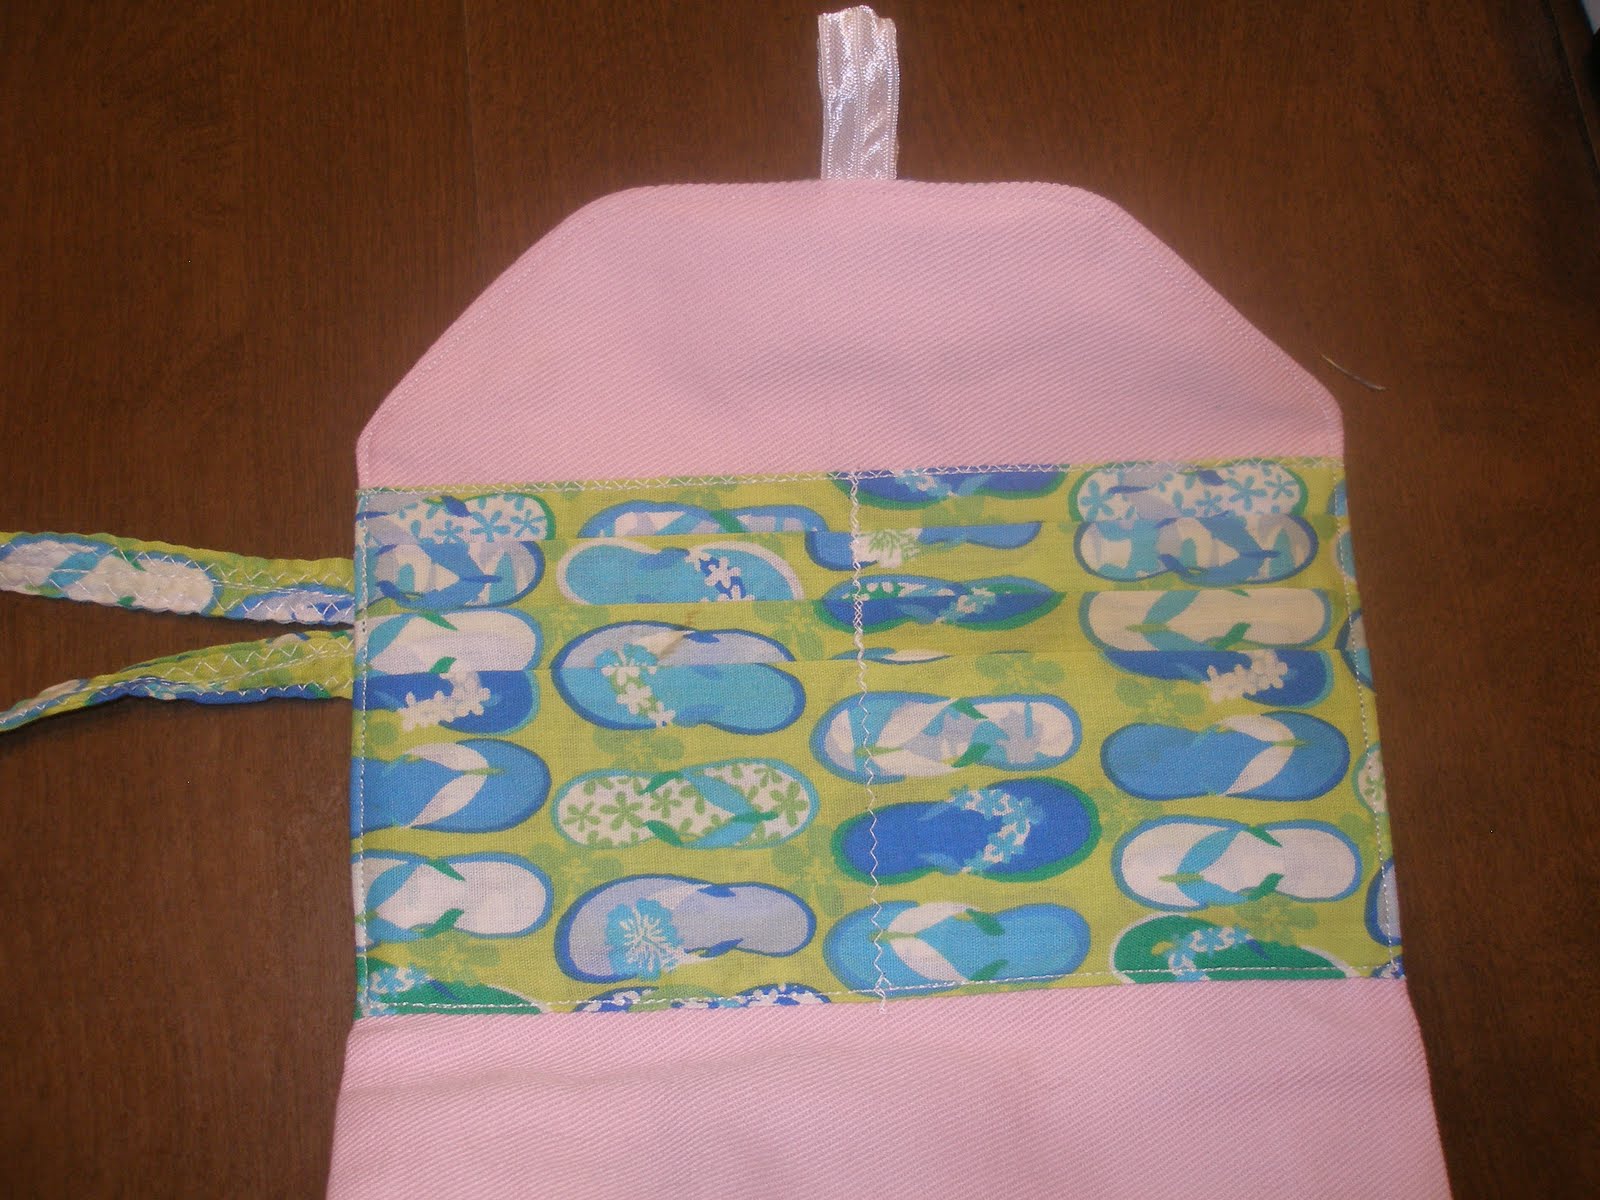
I came across this wristlet tutorial on whipup.net that looked like it would be flexible enough to be used for whatever she needs to carry.  I had this cute flip flop bright green fabric & a pink denim. The main piece is padded and the outside pocket is also padded. It has lots of little pockets for games on the inside. I changed the button loop to elastic instead of a fabric loop so it would have a bit more stuffing room. I also thought it needed something on the back so I made a flower like this one out of the pink denim. I had a cute little green flower button to finish off the flower & a big antique grey button for the front.

Back view with safety pins
"Give me the camera, Momma"
Also I finally got a picture of this cute dress I made for S. about a month ago. The main fabric was a large flat sheet we found at Goodwill for $3 (I'm getting lots of use out of it) The contrast fabric was from Nana.  The pattern is from this cute ruffle top I was thinking of making for myself.  Making clothes for the 19 month old is so much more fun.  I followed her instructions as is. The shoulder straps are a little long so I think I'm going to add buttons on the back so I the straps can open to put on. Currently she's just wearing it with safety pins. It's floor length for her but she likes it and it's super cute so I think I'll just leave the length for now.