Thursday, February 16, 2012

Catching up

I've been kinda jumping around on crafts lately. Started teaching Madeline crochet. We've tried several times before, but one or the other of us got frustrated with it and gave up. She asked again a couple weeks ago if we could work on chains and we sat down and worked on it and looked at a video from Lion Brand website and she figured it out. So she's been busy making mile long chains lately.  She feels like a chain professional. Now what to do with the chains?? She doesn't want to take them out. We'll figure out something. On to the next stitch.  This time next year, she'll be whipping out her own projects.

I wanted to make myself a nice lacey shawl for spring/summer. I've had this Luster Sheen in my stash for a while and hadn't found anything to use it for. I found this beautiful pattern on Drops (beautiful free knit & crochet patterns on here) and I have a match.  It's slow going right now, figuring out the pattern and keeping rows straight, but once I get that down, it'll be a breeze.

Pinterest has been a great source of inspiration and patterns. I came across this beautiful blanket on pinterest and had to find out how it was made. It's a stitch pattern called Bavarian crochet. It's worked in the round like granny squares, but with a lot of back post work to make the ridges and shape petals into squares. It's a pretty cool pattern demonstrated here on youtube. I had to try it out right away. Just started out with a couple scrap pieces, but I think I may just continue it from  here and keep working at it a little at a time. New long term project!

I've also been discussing Easter dresses with Madeline. We looked at a few different dress patterns online and decided on this party dress. Madeline decided she wants a white dress with red sash and accents.  I may already have all the fabric I need for it and red & white would be cute for the boys also.

Tuesday, January 17, 2012

Aromatherapy cold day friends

I made some cute, rice filled handwarmers for Christmas gifts. When I showed them to my aunt she had a wonderful idea to make them bigger for the kids to snuggle during cold car rides. I thought that was great and could even make them teddy bear shaped and put some lavender in them to smell nice. So what do I see at Kroger today?These aromatherapy buddies. Stuffed animals, filled with rice or something similar and lavender. So, I'm thinking, what a wonderful way to use some of our multitude of stuffed toys, I picked out a few small toys that aren't played with much.

They all turned out to be Ty beanies, which made this whole process much easier. I undid the stitching in the back and removed the beanbag (some are attached and had to rip out a few more stitches to release it.)

 The blue teddy had bean bags in the hands and feet in addition to the butt bag. I unstuffed teddy completely (except the nose due to embroidery) so he could get a good washing.

 I made rice / lavender bags to match the bean bags that were there originally. I did make the rice bags slightly larger so there will be more warm area.

I filled the bags about half full (like the original bags) with mostly rice, maybe 1/3 lavender.

I put the bags in the arms & legs first, put some stuffing in the tummy first then added the rice bags and more stuffing on top. Stitch the back closed again and they are ready for 30 sec in the microwave and a snuggly car ride. The kids enjoyed them. The lavender helped calm the baby down for a peaceful car ride and they even like sleeping with them!

PS.  My eldest requested one of her little care bear toys be converted. This was not a Ty beanie, and is a very small toy (no bigger than my hand). So we took out all the stuffing from the body, leaving the head and legs stuffed. We stuffed it with plain rice (she didn't like the lavender scent, and no bean bag for this one) using a pencil to get rice into the arms. Then we stitched up the back nice & tight so no rice escapes and it was ready for use - start to finish - 1/2 hour.

Tuesday, January 10, 2012

Headbands and minimalism

Our family goal this year is to pare down our "stuff." Phil and are both like the idea of the minimalist lifestyle, plus it will help our family of six plus two cats fit a little better in our little two bedroom house.

So my personal goal this year is to not acquire any new fabric or yarn but to go through and actually use my stash. By the end of the year I hope to have my stash down to one storage container and have lots of cool gifts to give away. The corner that is currently holding several containers full of fabric/ yarn could then be converted to a permanent sewing nook. Currently, I just set up shop on the dining room table.
yeah, it's a little messy! six containers, plus a couple in my bedroom closet

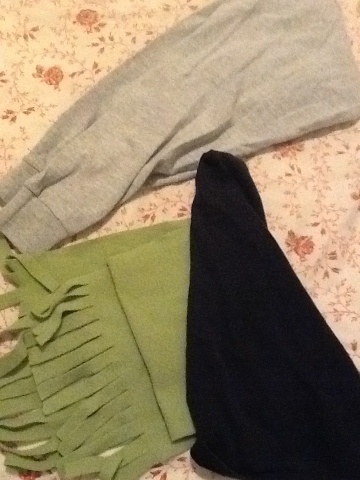
So my first stash buster has been scarves and hats to give away to anyone that needs them. I used up a few old t-shirts, some fleece and some flowery flannel and got about ten scarves and a few hats.
Just a couple of the scarves and a funny shaped hat.
My second project, found on pinterest, is these braided/ woven headbands. Excellent for using up some more t-shirt fabric. Most store headbands either pinch my head or give me a headache or don't stay on. These are stretchy all around and have enough texture to stay put and made to fit my head snugly without hurting. I love them.

My favorite one is this green one I used the seams cut out of tshirts. One of the strips has black stitching on it and looks nice with the greens. It's super stretchy, soft and (here's my geeky side showing) it makes me feel like Princess Leia on Endor. And who doesn't love being Princess Leia!!
The dark green braids reminiscent of Leia's braids.


Tuesday, January 3, 2012

Christmas

Slowly getting back into the swing of things. We're getting our homeschool routine back in order and baby boy is getting a sleep routine so I have a bit of free time in the evenings. I did a lot of crafting for Christmas. Pinterest & Tipnut are my big inspirations lately.  I like to have lots of stocking stuffers to give away, so I worked on some crochet scarves, some t-shirt scarves, crochet washcloths and beaded necklaces/ earrings. I also found this this cute idea for hand warmers on pinterest and used up some of my small pieces of fleece and a bag of rice.


I'm slowly working on a countdown calendar in the form of a Christmas tree wall hanging and ornaments to add for each day. Pictures to come later. I was inspired by a couple I saw on pinterest, this one for the idea and buttons and this one for the big size for the kids to decorate . This will give us a tree without using up precious floor space and also a tree the kids can enjoy decorating. I finished the tree and pockets part for this Christmas and we'll work on it throughout the year so we'll have a complete tree/ countdown for next Christmas.
Found this very cute flower vine scarf on tipnut to make for my oldest who loves flowers and I found this cute pattern for a simple wallet that I made for the younger kids and carrying case for a Nintendo DS here.

So that was my Christmas crafting. Didn't get everything done that I dreamed up, but I got lots finished and everybody was happy. I have a bunch of projects pinned that I really want to try, so hopefully I'll be a bit more regular on this blog now that we're done with the big holiday season.

Tuesday, November 8, 2011

Placemats

Been out of the loop for a few weeks. Baby #4 was born Oct. 11, so I haven't had any time for crafting this month. Last month, I made place mats. Mostly to protect the table from spills. My girls are terribly messy eaters. I did terry cloth for one side from a beach towel that never gets used. Better for catching and cleaning spills. I cut the edge off the towel and cut it into 6 pieces - perfect place mat size.
I've had some bright yellow/ green tapestry fabric in my stash for a while, so I used it for the other side/ binding. By cutting the green fabric about an inch larger on all sides (2" longer width and length) than the towel I had enough to fold over the edges of the towel and fold under to topstitch around. I think they turned out nicely and make after meal cleanup easier.

Monday, October 3, 2011

DIY "Moby wrap"

I am an ardent baby carrier and have enjoyed carrying all three of my children in infancy. With my oldest I made a pouch carrier and used it for the first few months but found it too inflexible and switched over to the Baby Bjorne for most of her carrying.
When my son came along I discovered the ring slings and the flexibility that I was missing in the pouch. I made myself a beautiful pink striped carrier and used it often for carrying my son and then it continued to be used when daughter #2 came along. I was able to carry on taking care of the older two with baby in the carrier. Nursing in public was never a problem as the carrier came with built in coverup. The only issue I had with it is the majority of baby weight is on one shoulder and the back. Having been rear-ended a couple of times has messed up my neck and I'm more prone to soreness there and in my shoulders. I found extended carries could exacerbate the pain.
Seam in middle
This pregnancy I have seen the "latest" carrier - the Moby wrap. It's basically a long (6 yd) piece of fabric ( usually knit cotton jersey) that is wrapped around your waist and over both shoulders. Baby is tucked in the middle and it seems weight is evenly distributed across both shoulders and your back! Sounds like a solution for my sore neck.

tapered end hemmed


finished , just needs pressing
So I googled info on how to make one, decided to go with a woven (more support) rather than knit (more give). I used a flat cotton sheet for fabric. Cut it into 26" strips. It wasn't long enough for the full 6yds so I cut two 3yd strips and seamed them together with a French seam and folded over and sewn down the edge. So, although a seam is not recommended for baby carriers, I feel pretty comfortable with this as it's a very strong seam. I hemmed both edges and ends. I was going to leave like that but on more research found that the Moby wrap actually has tapered ends so there is less bulk. So I went back and tapered the last three feet on each end to a point and re-hemmed the tapered edges. It feels like it fits well, even over my big 37 week belly, so it should be plenty long. I may go get some knit fabric later after seeing how this one works. Knit is so much easier, no sewing required as it doesn't fray. Just cut and you're done!
Wrap on, with preggy belly sticking out the bottom!

Sunday, October 2, 2011

Crayon crafts

Did some fun crayon crafts last week with the kids. The first was, you collect some smooth rocks, heat them in your oven at 350 for 15 minutes. You can then paint with crayons on the hot rocks. The way the wax melts on the surface of the hot rock, I found mesmerizing. The kids really enjoyed it and you can do two art projects at the same time by having paper under your rock. My eldest enjoyed drawing on the paper with the melty crayons (kinda like pastels). We found the lighter colored crayons gave the best results. Also don't try to draw pictures, abstract works best with runny wax!

The second crayon craft was fall leaves made from grated crayon melted between layers of wax paper and then cut into leaf shape.  I was out of wax paper so I used a cereal bag. I tried several different crayon colors across the bag mixing some of them and trying to get some colors a little isolated. The brown and orange kinda took over most of the color.  Grate crayon on half the bag or on one sheet of wax paper, cover with other half. Place in between paper and iron on medium low temp, just enough to melt the crayons and melt the layers of wax paper together. While it's still hot, you can smoosh colors around a bit then let it cool, trace your leaf shape and cut it out. I haven't hung mine up yet, but you can thread them with needle & thread or tape them up or however you desire.  We've just been enjoying them scattered on our table!